Tomas Egger
-
Posts
3514 -
Joined
-
Last visited
-
Days Won
20
Content Type
Profiles
Forums
Events
Everything posted by Tomas Egger
-
Ola Ito, Please, upload in our FTP.. http://www.eias3d.com/forums/showthread.php?tid=93 Choose the Camera Bug folder and notify us :) Thanks Tom
-
Ola Gian, We are running here, dont worry!!! Its more and more closer :) Thanks Tom
-
Ola Gian, So, Lets wait EIAS 9 :) Thanks Tom
-
Ola AVT, From Stephane to you and all users: “Stéphane Crouzet Hello Alonzo, place your script here "MacOSX/Users/Username/Library/Preferences/Autodesk/maya/2011-x64/scripts". Then open Maya, the Script Editor and enter loadNewShelf ""; in MEL and find the "shelf_modomotion3.mel" file. It works for me.†Thanks Tom
-
Ola Michael, Please, upload your scene, Let me look.. Appears some setting problem.. :) Thanks Tom
-
Ola AVT, MDD dont work with mesh which change the number of polys over time., its a format limit. Thanks Tom
-
Ola Gian, Experiment change all groups AA (group info window) from 1x1 to 2x2 and then you change in the render info window from 4x4 1x1 to 8x8 2x2. Thanks Tom
-
Ola Gianluca, Look this thread, have info to improve renders with GI and Photons, I did a step by step. http://www.eias3d.com/forums/showthread.php?tid=548&page=1 Thanks Tom
-
Ola Alex, Wonderful :) Thanks Tom
-
Ola Michael, Beautiful work!!!, wonderful use of Photons :) Thanks Tom
-
Ola Gianluca, Wonderful use of EIAS 8, you are right, EIAS 9 will bring us speed and the memory limit will be limited only by your amount of physical Ram in your machine. We are running here :) Thanks Tom
-
Ola Vic3D, First test is use a HDRI map like a Adaptive Sky Map, you can have a version to light the scene (512 x 512 pixels), Since our Engine sample the pixels to light our scenes, a small map will be really faster than Huge HDRI maps and one Higher resolution to add in the World Info window in the Raytrace Reflection and Refraction tabs. Then you will rotate the Adaptive Sky map as your taste to light your scene :) I feel it will reach the render time you need, if you want later, or miss it, add another light to push more and mimic better a Sun for example, if this is the specific case. Any Prb, do a really simple prj, I will be glad to help you. Thanks Tom
-

Adobe After Effects CS5 misinterprets .IMG animations' frame rates
Tomas Egger replied to Juanxer's topic in EIAS 8.0.0
Ola Juanxer, No, we didnt change anything, Adobe is changing lots of things these days :( Thanks Tom -
Ola Tango, If am I not wrong, its the only way, export and re-import. Ian used it a lot, lets waiting him to answer :) Thanks Tom
-
Ola Ito, Try to open in EIAS 6.5 before to open EIAS 8.. Interesting ideas by the way you did.. Thanks Tom
-
Ola Dieguito, Its always a pleasure to teach :) Thanks Tom
-
Ola Ito, You did a solution to mix soo many delicate themes. Thanks Tom
-
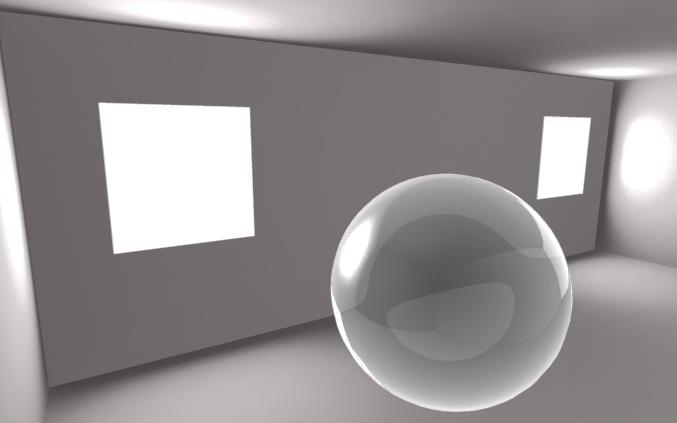
Ola Dan, Now: Photons + Glass 1) Open the Last Photons + Customize project 2) Replace the RED ball Material with a Glass Material from Material Pallete / Sphere Material Reflectivy + Use Fresnel Term to attenuate the reflection center of the sphere + Change the Raytrace Mode pop-up to Normal. 3) Sphere Material Info window / Transparency tab / Main Options Tab / Enable Use Raytrace check box, Transparency slider = 0.001, Refraction Index = 1.33 + Use Fresnel Term as Transparent. 4) To speed up the render, Sphere Group info window / Shadow Tab / Turn off the Receive Shadow check box. 5) Light 1 / Photons / Photons Map Tab, Change Map Mode pop-up from GI to GI & Secondary. 6) Add a second Radial Light in the scene and Change the GI Mode pop-up to Secondary. 7) Change this new light Intensity / Properties / General Tab / from 1.0 to 0.45 and turn off the Enable Highlight check box. This extra Radial light in Secondary mode + Another light with Photons help to have a better glass without Huge render times, you can disable it to see only the Light with Photons working, you will have a darker glass. I use this trick to avoid secondary rays in GI window which make GI renders realllllly slow. 8) Thats it, render a snap shot, it will be like this: Project Attached: Photons+Glass.zip Hope that helps Thanks Tom

-
Ola Dan, First: Photons + Reflex 1) Open the Last Photons + Customize project 2) Make the RED ball reflective / Sphere Material Reflectivy + Use Fresnel Term to attenuate the reflection center of the sphere + Change the Raytrace Mode pop-up to Normal. 3) Light 1 / Photons / Photons Map Tab, Change Map Mode pop-up from GI to GI & Secondary. 4) Thats it, render a snap shot, it will be like this: Project Attached: Photons+Reflex.zip Have Fun Thanks Tom
-
Ola Vgd, Interesting.. :) Thanks Tom
-
Ola Dan, Photons are incredible fast!!!! and Amazing results. Later, I can teach How to setup fast Metal reflections and Transparencies in this particular room :) I always have my lights as “Permanent†photon maps. Thanks Tom
-
Hey Apu!!! No Words!!!! GREAT!!! Thanks Tom
-
Ola, I forgot the last Snap Shot: And the Project Files: TOM.zip Enjoy it Thanks Tom
-
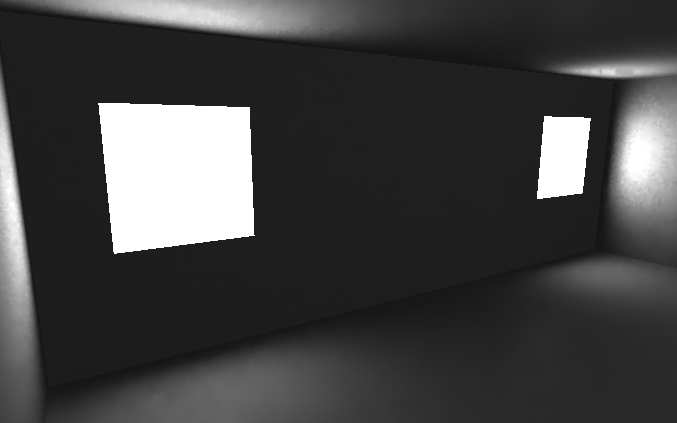
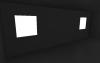
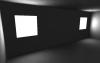
Ola Dan, Lets Go (all Projects included in the attachment): 1) Turn off Render Window AA to speed your render 2) GI Window, change your Primary rays to 50.0 3) Duplicate your Room Effector and scale it in X axis -1.0 and move it to X-2.315, Y=0.9299, Z=0.0 (to close your room and to give more space to Camera see whats happening) 4) Move your Camera and change your the lens to 16mm 5) Change in the Camera 1 Info window / Roto_Comp /Background Color to White 6) Change in the GI window / Skylight from 0.5 to 1.0 7) Reverse Illumination Bounces to 1.0 8) Do a Snap Shot, It will be something like this: 9) Its clear, GI Skylight doesnt help in interior scenes, only a really small amount of Rays of the Raytrace engine will enter in the Windows's room. 10) Disable GI Skylight check box. 11) Place your Light 1 in the middle of both Windows and next to the wall 12) Change Light type from Radial to Area Light 13) Place the Area Light Reference in the Opposite wall of the windows 14) Light 1 Info Window / X-Form / Area Light Size U=4.1 V=0.8 15) Enable Raytrace Shadow 16) Enable Use GI Sampling Engine in the same Shadow Tab 17) Change the Optimize Distance value from 0.0 to 2.44 (My Light To Reference Distance in the X-Form tab) 18) Go to Area Light 1 info window / Properties / Area Light Tab / and change the cool feature “Block Distance†from 0.0 to 0.13 (which tells to Camera Analyze the walls and see where the Rays are blocked by the walls or not, this means, all the 100 Rays will be going in the windows holes without loose any ray) 19) Change in the GI Window the Color Tolerance from 1.0 to 3.0, It will make the Shadows details more precise. 20) Do a Snap Shot, You will have something like this 21) Photons time: 22) Go to Photons / Photons Map Tab: 23) Enable Generate Photon Map 24) Change the GI Lookup Radii value from 2.0 to 4.0 (this is a value which I found interesting in all my project scenes) 25) Change Baking pop-up to Database (Hit OK only) 26) Change the Calculate Pop-up to Permanent, It will tell Camera to Save the Photon Cache, if nothing is animated in the scene, only the Camera, it will read the Cache instead of Calculate it each frame. 27) Change the Direct Lookup Radii value from 4.0 to 5.0 (A good value is when Direct is half of Database “segment length†value, which is already 10.0) 28) Change Bounce Lookup Radii from 0.0 to 6.0 29) Change the Density Diagnoses “Distance†value from 1 to 2.44 30) Since your Scene size is really small, you can see looking the Density Diagnosis Photons is really Huge, you will need to have around 300.0. 31) Change the Emission Photons from 100.0 to 1.0 32) Do a snap Shot, It will be Full White 33) Change in the Area Light Properties / General Tab / Intensity value from 1.0 to 0.5 34) Render a Snap Shot, it will be like this: 35) Go to Area Light Properties / Dropoff Tab / and Enable Dropoff and Change Dropoff Type pop-up from Linear to Quadratic 36) In the same Tab, change Control Distance from Absolute Value to Light to Reference. 37) In the same Tab, Change the Over Intensity from 1.5 to something like 60.0 37) Quadratic Dropoff + Light to Reference will tell Camera to simulate better the groups next to a Light, burning more the surface of the groups, in our case the windows holes. 38) Do a snap shot render, it will be something like this: 39) Change GI Window Primary Rays to 200.0 and Area Light Properties / Area Light Tab Primary Rays to 300.0 40) Change Render Window Info Anti-Alias tab / Anti-Alias pop-up to Adaptive 41) Added a Red Sphere only to show Why I changed the GI Window Bounces from 0 to 1. :) We see the Bleeding Red colors on the Floor. 42) Render a snap shot, it will be like this: 43) Last Feature which is really interesting and need to be used like last alternative is Light 1 Info Window / Properties / Customize Tab 44) I changed both Direct Illumination and Bounced Illumination graphs to show How it can help the user improve the Light scene, Open the project included and analyze it. 45) Render a Snap Shot, It will be something like this: Hope that helps Feel Free to message me any time :)


-
Ola, Stephane from our EIAS3D team discovered this interesting and “Free†Maya script which export multiple MDD files from Maya, these MDD files are compatible with EIAS. :) http://www.modomotion.com/ The second option is Point Oven tools (payed license): http://www.ef9.com/ef9/PO.htm Thanks Tom