HMeyers
-
Posts
29 -
Joined
-
Last visited
-
Days Won
2
Content Type
Profiles
Forums
Events
Everything posted by HMeyers
-
Richard … Wow … have no idea what I could contribute - still have modeler on a 2000 - 17" iBook pro (LOL) - haven't used it in years though … but if I were to request anything it would be automatic - adjustable - configurable - beveled text (which used to be in FormZ - but was removed several versions ago) … The beveled text in EI currently is good … however … a variety of adjustable bevel options would be wonderful. And for that matter - adjustable bevels on all 3d created objects would be a major plus. Thank you … for doing this … Hal Hal Meyers p.s. - Oh … I might be able to assist when it comes time to create the PDF / interactive manual / …
-
If you want to get up to speed … and I mean fast, when it comes to rigging … get AVT (Alonzo Von Threet's) DVD's on the subject - well worth it … plus he's a great guy and can assist you with the rigging process. I've hired Alonzo in the past and his work is exceptional (he was recommended by Tomas) … he's mentioned his DVD's on this forum as well. I'm sure you can find the info with a quick search. Here's a link I found on the forum - and if you scroll down you can get to his DVD offerings:
-
Yes - I found all these figures in Turbo Squid - they are not moving things about - but they could be positioned I imagine - here's the link: http://www.turbosquid.com/Search/Index.cfm?keyword=clerk
-
 Thomo … I just came up with a crazy thing the other day (I sent all the info to Tomas and to Paul at FormZ) - and it's partially true … the FACT export transparency issue is based on the "color" assigned to the object in FormZ prior to it being exported as a FACT (Texture box un-checked). Initially I thought it was a ROYGBIV situation … because I did a test like that and it each progressive color - starting from RED being 100% transparent yellow 80% =/- transparent to BLUE (100% solid) - was a mind blower. The I tried it again and it didn't get the same results. Except Red was still 100% transparent and Blue 100% solid - the in between colors weren't registering as a transparency % - they too were 100% transparent. And it could be that they started out as RED and then another color assigned (ahhhh) Anyway … it's a start … something to think about.
 -
Thomo … … glad you mentioned the export and unchecking the textures tab. I recently had a discussion with Paul from FormZ tech and he went onto EIAS during our conversation and saw the issue first hand. I know both he and I sent emails to Tomas … and now that Paul knows what's happening maybe FZ can look further into it on their end. It's still a problem in the new beta. Anyway, glad I was able to assist Supernovavfx … and thank you for the kind compliment. Hal
-
The "ton's" of shapes can be really daunting - I have several "manufacturing clients who send models with tens of thousands of non-well-formed parts made up of zillions of pieces - FormZ is pretty good about putting these together pretty quickly. So again … if you need some help - let me know I might (the word is "might") be able to help you. FBX is very good - Tomas suggested the FBX format as well for a model I was doing and it worked beautifully. Another great suggestion that has floored me several times … was importing into BLENDER - and exporting from there into one of several formats … Blender has saved me several times … exporting the "parts" well formed and correctly textured/colored. And I really don't know blender at all - yet - for modeling. Again … if you run into a problem let me know - via email (hmeyers1@mac.com) - since I won't be on the forum for long. Then we can even talk on the phone - I'm in Maine - 1:37 pm here.
-
I think I can open it in FormZ - which is supposed to handle 3DStudio (if that is the format) - so if you are still having troubles let me know and I'll be happy to give it a try - and export it to a FACT or whatever format you want that FormZ has at it's disposal. Hal Meyers hmeyers1@mac.com
-
I too have had problems with FZ fact files - haven't upgraded to FZ8 yet because of numerous issues I've read on their forum, and can't afford to be stuck in limbo - but will in the future. I did Beta test Fz8, and it was good … there were issues, the main one being the fact export which is supposed to be fixed with a patch … which is another reason I hadn't upgraded, I didn't want to apply a patch to a NEW version, I was hoping it would be implemented in the version, permanently … I JUST recently had a client send me a STEP file … that I was going to import into FormZ and then export as a Fact or OBJ … it was big 1.2GB - FZ7 could not open it and crashed every time. I sent reports to FormZ tech support and their were wonderful. I sent them the file as well and they took the time to try to open it … and were only able to get a small portion of the project to open. It appears there was some bad data, somewhere. Then I went to another source - as I found out the original files were solid works … so a friend has and uses it from the local university in the applied sciences building. They looked at the SW file and were able to export several formats for me - with a Solidworks obj convertor. Again, formZ couldn't handle it, kept crashing, and I was not able to bring it into EIAS either as the files weren't recognizable (?). … hence … for the heck of it I tried to import the Universities OBJ into Blender and it opened … from blender I exported it as an obj and it opened in EIAS perfectly - with different "colors" on the parts. I must tell you that the file was huge … and I spent days looking for and through parts, grouping things etc. - then several more days applying simple textures (more like mute colors) to the over 5800 pieces. … then I needed to create an integral part of the item for the clients model (it was missing in the original SW file) … so I went to fz7 and built it - a series of "Heat exchanger Pins" - over 6300 pieces - that I grouped accordingly and sent to EIAS … no problems. … yes … things have been coming in with a transparency … I noticed that recently, why, I have no idea, so I immediately create a simple texture to assign to items upon importation and that seems to clear things up. I also … after watching the AVT Pro DVD's … now, always, export my FZ7 objects as parked FACT objects and reimport them - also, always performing a diagnosis which seems to straighten things out and will fix most anomalies - including allowing me to flip axis, inverting normals, etc … I will update to the New FZ8 soon - because I like some of the new tools - but will keep 7 handy. Again, EIAS has the tools to fix most of the exported FACT files from FZ7 … but, don't hesitate to talk to their tech support … they can usually provide an answer. I hope some of this might shed a little light …
-
Richards Idea … is amazingly practical … and if you take each fold step and save it as it's own program (picking up where the last fold left off) I think you'll find it to be easier to work with to fold and then unfold it … and I'd probably work backwards starting with the folded unit … if this makes sense. I think you will want to get all your parameters set with the folded piece, lighting, angles cam movements first … then add additional cam movement for each unfold/fold (if needed) … because each program is one fold you can then duplicate the fold animation and reverse it … and you are only dealing with two actions/animations to render per program … Hope this makes sense …
-
Scott … Wow, excellent work, super clean … beautiful. Congratulations on your "win" … Hal
-
I don't know if EIAS 9.1 works on Yosemite … I wrote to Tomas and he said that he hadn't tested it yet, but probably works fine. I've been running 10.9.5 with both EIAS 9.1 and FormZ 7 and they work perfectly. I won't upgrade to Yosemite until I know that FormZ 7 works on it, and not sure if and or when that will happen. A few other people mentioned the same thing to the FZ folks on their forum and they are going to look into it … but that FormZ 8 works (just not for us EIAS users without the updated FACT export plugin).
-
I was researching a model option for a potential project and found one I liked in TurboSquid … created by MotionCow. However, the only formats were OBJ or FBX - so I sent the link to Tomas. He suggested I try the FBX. I wanted the ability to manipulate the object, animate it … and the FBX was fully rigged. However … I didn't want to spend the money to buy the model just to "test" it … for a "potential project". So, I wrote to MotionCow and they immediately responded and sent me a sample FBX model (sans a few polygons) with rigging. I opened it in EIAS and everything was perfect. I rendered out a 360 cam test at 1920 x 1080 … which took under 7 minutes to render (Go EIAS). Then I exported to 1080. I assigned a generic skin texture to this rigged test sample … added a plane and a rear lighting and the results are wonderful. If I can figure out how to upload the animation I will add it to this post later today.
-
Just found out that if you use FormZ 7 it will not work with Yosemite. However, according to the FZ forum v.8 does work with it. However, if you do use v.8 or are thinking of upgrading from an earlier FZ version to FZ8 you will need to get their FACT export fix plug-in - I don't know if they've included it in the latest version. Basically if you export a FACT in FZ8 - when importing into EIAS the model came in sans any texture/color - whatsoever. Then when you opened the items material and attempted to access it - you were stuck in limbo and had to force quit out of the program. To circumvent the "limbo" you would first have to drop a texture/material (any texture or material) onto the item or assign it to a master material before accessing it. The plug-in you can get from FormZ for v.8 (again, if it's not already included) will fix the export problem.
-
"Freezing" a Global Coordinate-based map into a local one?
HMeyers replied to Juanxer's topic in EIAS General Forum
Richard … Ahhhhhhh … stupid me … I just figured out why the texture was moving - ready for this, I was using an ubershape, a few squares - I didn’t actually build a model, I was just testing. So then i went into FZ and made some squares, stacked them exported as FACTs and then imported and put them into my test project. I deleted the old Uber squares and attached the new ones to the CreateUV - and bingo … it worked. The texture now moves with the pieces. … Now I have to see if I can get this to work with a Kaleidocycle piece as I develop it. Any hints on how to make a Kaleidocyle animate correctly in EIAS would be greatly appreciated. What I did, to make the texture/material mapping easier is to have each face of the tetrahedron a separate piece (each 3D Tet is actually made up of 4 pieces), thinking that would be an easier way to map the 6 surfaces with a single texture (4 surfaces - 4 textures). Now I'm not so sure that will work since I wouldn't be able to attach the pieces I need to the CreateUV - if they are in other grouped Tet's. I hope this makes sense. It might be easier to map to each individual piece … but currently that is not an easy task either. Of course the hardest part is to get the 3D "segments" to remain attached to each other and to rotate without losing the attachments in the correct space. Thanks, Hal -
"Freezing" a Global Coordinate-based map into a local one?
HMeyers replied to Juanxer's topic in EIAS General Forum
Richard … Hal Meyers here - I hope you are well … I am in the process of creating a: Kaleidocycle. Currently just doing a rough test, but, I am running into NUMEROUS issues. However … for the test my first thing is to - as the gentleman above - map one large texture on top of my model so that each segment gets their portion. With that said - I made a wall of cubes … to test the Create UV plug-in that I downloaded and installed (thank you for that info). – and - I also downloaded your puzzle … to study it … - and - after doing everything you said, and copying the settings - I get my blocks to perfectly accept their portion of the material … but if I move one away - the material (assigned to the creative UV) - moves with the blocks Any thoughts? It really is driving me crazy. As I see the texture lined up across all the blocks the way I want - but it moves with whatever block I move. … and that is the tip of the iceberg - Once I can figure out how to get the map to not move then I have to build the Kaleidocycle - which is extremely problematic. It makes the rubies cube like like a piece of cake. But once I get it done I will be delighted to share with the EIAS group. Help!!!! Please … (hmeyers1@mac.com) -
After reading this thread I called FormZ - yesterday (Sept 25th) - and talked with Matt Holewinski. I gave Matt the link to the discussion to look over and take back to the FZ folks so they realize there are still a number of animators who build models in FZ to use with EIAS, and that some of the same issues from 18+ years ago still exist even though both programs have evolved tremendously. Over the last couple of years I contacted FZ almost on a weekly basis bringing up issues I was having … the tech guys seemed to always find a solution that worked … things I never would have thought to do. The first step was converting a smooth object to facetted because for some reason the smooth object in FormZ doesn't translate well with EIAS. I still use TRANSPORTER even though I was told that was probably not necessary. It seems to clear up a number of issues. I also loved FZ's text beveling, which - years ago - was very simple, worked beautifully with most fonts and imported into EIAS without a hitch. Logos and floating text, as any model looks better with a bevel. In the newer versions of FormZ they removed the TEXT beveling option and hopefully they will re-implement it. However, the newest versions of FormZ will surprise a lot of long time users who abandoned it for other modelers. And for the most part, a lot of the strange shapes and objects, including cabbage leaves and a parachute-like baby blanket, have worked well when brought into EIAS - as FACT models. Oh … I wanted to chime in on the STP comment also in this thread. Last year I had a client send me an STP/Cad model of a boiler as recommended by the FormZ tech folk … they client was supposed to send me "solid-well formed" STP parts … they didn't. Instead I wound up with hundreds of thousands of segmented pieces which took me days to "join" in FormZ, a very long story. However, once joined and labeled I was able to send everything over to EIAS … and the animation results were stunning. Here is a link to the final animation … It's not super high quality … but you certainly understand all that went into the making of this piece. I hope you enjoy it … Hal Hal Meyers hmeyers1@mac.com
-
Tomas … Thank you, and thank you for introducing me to Alonzo from AVT Pro. I could not have done this project without Alonzo. And, I don't think it would have been as successful without the EIAS platform to render it on. – Bravo! Hal
-
Alonzo … Again, thank you for your tireless efforts with the project and with the Ready Rigs DVD's … … and … Tomas … Thank you and your team for the upgraded amazing EIAS … what a pleasure to use a program that has evolved, and continues to evolve … getting faster, more efficient, more powerful, able to leap (no sorry - got carried away), expanding it's accepted "model" platform base. It's a joy. … THE article Alonzo and I have referred to is coming … soon Hal
-
ReadyRigs DVD’s by Alonzo Von Threet … I’ve just had some time to delve into the AVTPro READY RIGS DVD’s and I have to tell you they are amazing. Alonzo Von Threet a long time EIAS user guides you through the entire “rigging†process leaving no “polygon†unturned or in this case “unriggedâ€. A little background on how I found Alonzo … In May of 2012 a company I work with on a frequent freelance basis, and having just completed putting together several animations for them of a new-fangled energy efficient “boiler†came to me with several interesting animation ideas/commercials for a hospital in New Jersey. Two of the commercials involved an organic animation, something I am not too familiar with, I’m much better with bolts, nuts, levers, cubes, spheres, logos, etc. However, this was a project I couldn’t turn down, a huge challenge. I quickly did my homework and realized I would need help. I am a long time EI user and have been faithful to the product, plus I was excited about all the upcoming improvements. I’d contacted Tomas several times with questions and he’d always assisted me and/or directed me to the right person to get my answers. And a special thank you goes out to Richard Joly too for his help in the past with a Rubik’s Cube animation test. Please note I am being a bit vague about the project description because I am currently working on a write-up describing the project at length. When I told Tomas what I was looking to create he immediately directed me to Alonzo. He said, if it’s rigging you are looking for then Alonzo is the guy. I emailed Alonzo, got a response right away and then I called him. What a pleasure, we hit it off immediately. He is a true animator, visionary, student of the art, creative/compulsive perfectionist and fun guy to talk to. I told him what I was doing, and I wanted to render using EIAS … why, BECAUSE … that’s the platform I use on a Mac. Well, Alonzo jumped at the opportunity to take on the task and performed miracles with the project (again … details to follow in the full blown article). At the same time we were working on various details he mentioned his rigging DVD’s. I purchased them for future reference and just the other day had a chance to really sit down and watch both the “Deformer Rig†and the “SKIN MAN†… Wow … my eyes have been opened (rigged to open that is – I know, I know enough of the “rig†asides), I’ve picked up numerous tips and tricks and thoughts for better modeling, animating, rigging, organizing … etc. And each DVD is divided into sections so I can pick and chose what I want to watch. I loaded both onto my computer and it’s a blast. I actually run a segment on one monitor while I follow along and do some practice rigging on another monitor. Now, if you are looking for a quick STEP by STEP … rigid format you won’t find that here. What you get, and it’s part of the Alonzo charm, is a thoughtful discussion of the rigging process and an insight into a working “riggers†mind tools. As he builds the rigs he tells you not only the physical process but the WHY, and how to plan ahead for the obstacles that may or may not occur. This is amazingly practical and makes perfect sense. Plus if you pay attention, you will realize from some of the comments Alonzo makes that he is the real deal working crazy hours, making mistakes, finding solutions, and giving you a terrific rigging experience from start to finish. I highly recommend the AVTPro’s ReadyRigs DVD’s … for anyone doing 3D animation, from beginning students, the non-organic 3D guys like me, to folks looking to expand their 3D horizon. just visit the EIAS forum link below: http://www.eias3d.com/forums/topic/5590-new-human-rig-dvd/ Thanks for reading … Hal Meyers hmeyers1@mac.com
- 5 replies
-
- 1
-

-
- rigging
- rigging made easy
- (and 5 more)
-
Richard, I am delighted to put all the Rubik 3 x 3 project info together. In the zipped folder, as requested is the: 3 x 3 project (see information pdf for details) rubik fac (created by Richard Joly) Rubik information (PDF) Thank you, Hal Rubiks 3x3 Cube.zip
-
Richard, Tom, I am attaching the 3x3 Rubiks project. I think of this project as the FINAL STEP, since, as Richard pointed out, you need to work backwards to create the animation. I have done several things to Richards original 4 x 4 project (which is totally amazing) to make this process easier (I hope) for anyone wanting to create a 3 x 3 "Rubik" - 1) Created a master material for each face 2) All "inner" faces of each cube are now assigned to a "black material" as Richard pointed out. 3) Effectors are assigned to rotate faces in the following manner … (moving clockwise starting with the Red Face) Effector A - Face 1 - (Red Face) - Rotate Z axis Effector B - Face 2 - (White Face) - Rotate X axis Effector C - Face 3 - (Orange Face) - Rotate Z axis Effector D - Face 4 - (Yellow Face) - Rotate X axis Effector Middle - Center Cube - Rotate X, Y, Z Effector 1 - Top - (Blue Face) - Rotate Y axis Effector 2 - Bottom - (Green Face) - Rotate Y axis 4) I suggest, as before, that you do a single rotation move and save the project "Save As" the next step # (?). This will be much easier to work with each rotation separately and you won't lose your sequence by linking and unlinking cubes to the effectors. 5) Then, after the final step is rendered, assemble the animation sequences/steps in the reverse order in After Effects or Final Cut, whatever - and you're good to go. By numbering each step render it's a snap to assemble. I also have 3 cameras to check the entire cube quickly, using only cam 1 for the actual step renders … but they could be positioned better for additional renders. Thank you once again … Hal 3x3 Work with Colors v.1.prj.zip rubik.fac.zip
-
Richard, I did notice that the other day when animating the 3x3 and thought it might not matter, but and however your daughter-in-law is right, it does, and I will fix it in my 3x3 - should be fairly simple. Thanks for mentioning that … and please thank her too. Hal Tom … Ahhhhhh - thank you … after I make the correction to the the 3x3 Rubiks configuration that Richard pointed out I will post the "master 3x3 project file" Best regards, Hal
-
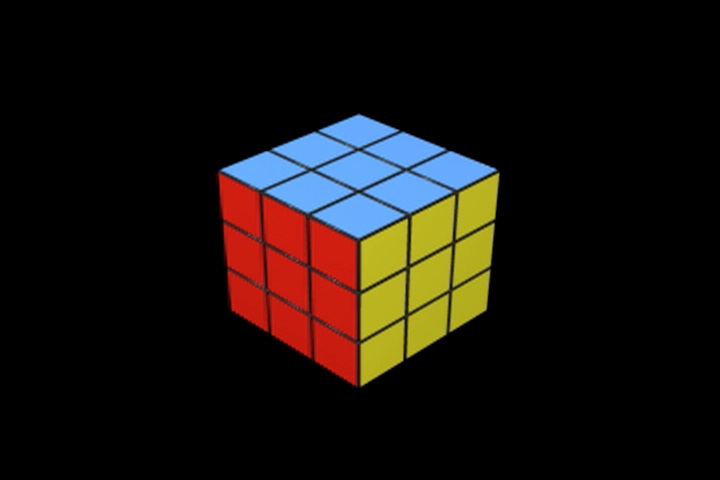
Here is a jpg of the 3x3: Here is a test #x# animation: Rubik Test 2.mov Hal Richard, Trying to attach the project file, but not able to do so. What am I not doing? Hal

-
Richard, Here is the file … Hal
-
Richard - … turns out the client's logo is a 3x3 so I eliminated cubes - attached to the "center cube" re-centered - de attached and then aligned 6 effectors to appropriate faces of each faces Ctr cube - noting on paper and naming them in EI as Effector A - face 1, Effector B - Face 2 - etc - Effector 1 Top and Effector 2 Bottom. Then I did a simple test to figure out the rotation axis for each face. Noting that on paper so I didn't have to think twice. (by the way, the job isn't a "100% go" yet, but I wanted to get a head start so that I'm ready when they are) I also added a 7th effector to the center cube - just in case! And, just for the heck of it … I expanded each cube selecting then assigning each face: Front, Top, Bottom, etc. to a master color - therefore I can instantly change any full face (9 cubes) to match the clients color scheme. I was able to expand several cube groups and select several "fronts" at one time, assigning them then selecting several "Tops" - etc. As you mentioned, select the group (Face/layer) you want to rotate and link to an effector then unlink and relink to another effector. However, I found that overall its easier for me to simply add a keyframe at "0" and my final Key frame at "1.5" seconds with a total render time of 2 seconds (allowing for a final .5 second still). The "0" frame is where I start to spin the Face and the "1.5" frame is the end of each move. Therefore Step one is actually the final spin to completion. I render as "step 1". THEN … (and it's much easier to do then to explain) I duplicate the project and "SAVE AS" step 2 - I now pick up where I began the last step by moving the "time thumb" to the beginning frame "0" - deactivating the effectors animation and unlinking the face cubes from the effector, which leaves the Rubik Cube at the first twist position. I select another Face linking it to the respective effector. Activate the effector and slide it's key frame to the 1.5 second mark. Next move the "time thumb" back to "0" and rotate the effector, which creates the first Key frame of step 2. Render and save the render as step 2. Duplicate project and "save as" step 3 - and repeat procedure. I used final cut express to put together a test animation - dropping each clip in starting with the last "step render number" ending at render step 1. The reason I chose to duplicate each steps project was so I can render out each animation step in multiple formats and resolutions and make subtle changes to each step without having to start from scratch each time. I hope this all makes sense. Once again, Richard - thank you for creating the 4x4 and sending the files. When I can figure out how to add attachments (I'll have to read it somewhere) I'll include the 3x3 project so others can use it too. And I'll add the test animation too. Thank you, Hal